Mount Alibaba Cloud on macOS — NetDrive Setup Guide

Step-by-step guide to mounting Alibaba Cloud storage as a native macOS drive using NetDrive. Access your buckets from Finder like any local folder.
A motion graphics studio archiving finished projects to Alibaba Cloud, or a DevOps team pulling deployment artifacts from a bucket in Singapore — both run into the same limitation on macOS: there’s no Finder integration out of the box. NetDrive gives Alibaba Cloud a volume in your Finder sidebar so you can drag, copy, and open files without switching tools.
This guide walks through adding an Alibaba Cloud connection in NetDrive on macOS 14 Sonoma or later, from downloading the installer to your first successful Finder open.
Mount Alibaba Cloud in Finder — no sync required
NetDrive lets Google Drive, OneDrive, S3, SFTP, WebDAV and more appear as native drives on Windows and macOS — no syncing, no full downloads.
- Access any Alibaba Cloud bucket as a native macOS drive
- On-demand streaming — remote files open without filling your local disk
- Manage Google Drive, S3, and Alibaba Cloud from a single Drive Manager
Free trial. Lifetime and subscription plans available.
What You Need Before You Start
NetDrive version: NetDrive 3.18 or later is required for macOS 14 Sonoma. If you’re still on macOS 13 Ventura, use NetDrive 3.17 — the last release that supports it. Download the DMG installer from netdrive.net/download/mac and run it before continuing. NetDrive will also prompt you to install a required driver component if it isn’t already present; approve that step so the drive can appear in Finder.
Alibaba Cloud credentials: You’ll need the following, all available from your Alibaba Cloud RAM console:
- Access Key ID — the identifier for the RAM user or root account you’re authenticating with.
- Access Key Secret — the paired secret; copy it now because the console won’t show it again after creation.
- Region endpoint — the storage endpoint for your bucket’s region (for example, the China East 1 region endpoint or the Singapore region endpoint). Your bucket’s overview page lists the correct endpoint under Endpoint.
- Bucket name — the specific bucket you want to mount. You can add additional buckets as separate drives after setup.
Using a RAM user scoped to only the bucket you need — read-only access if you’re just pulling files — is worth the extra five minutes of setup in the RAM console.
Adding Alibaba Cloud in NetDrive
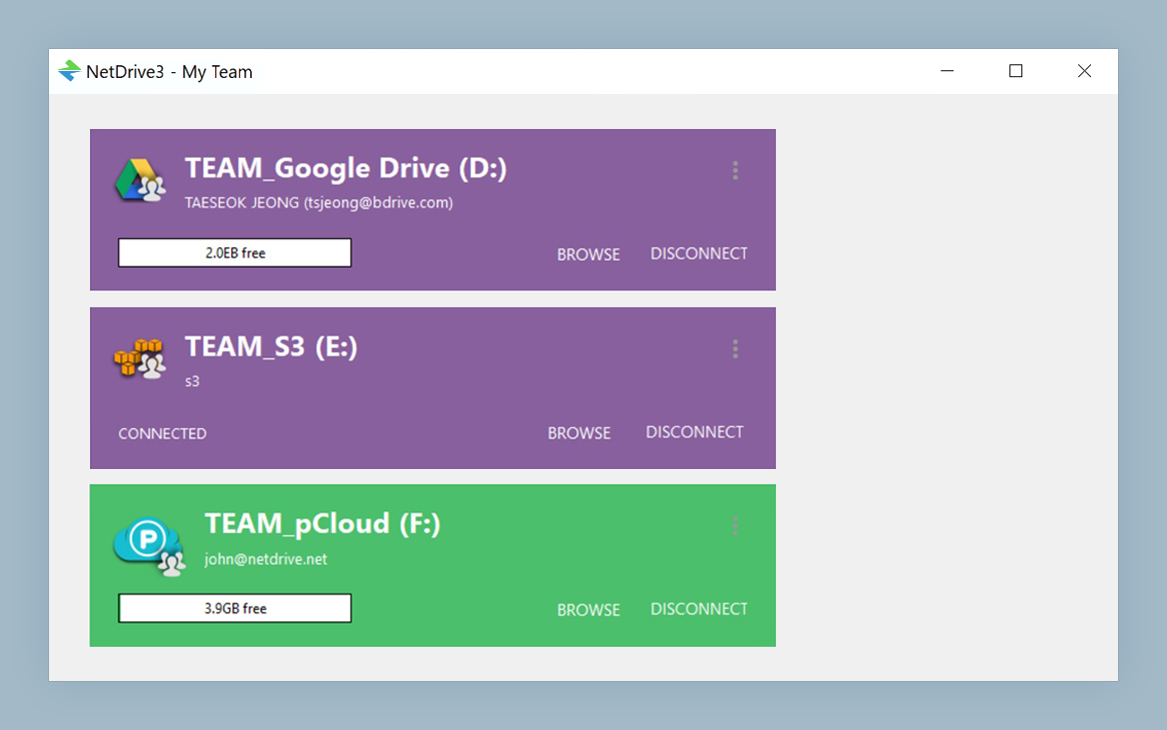
Open NetDrive from the macOS menu bar icon or from Applications. The Drive Manager window shows all your connected drives as cards. If this is your first drive, the card area will be empty.
- Click + Add a drive in the top-right corner of Drive Manager.
- Find Alibaba Cloud in the provider list — it’s listed alphabetically — and click it.
- Fill in the connection form:
- Access Key ID and Access Key Secret from your RAM console.
- Endpoint — paste the region endpoint for your bucket.
- Bucket — the name of the bucket to mount.
- Give the drive a recognisable label under Drive name (for example,
Alibaba — SG Renders). - Leave Mount type as Network drive for standard use. Switch to Read-only drive if you want a view-only connection.
- Click Save, then flip the toggle on the drive card to connect.
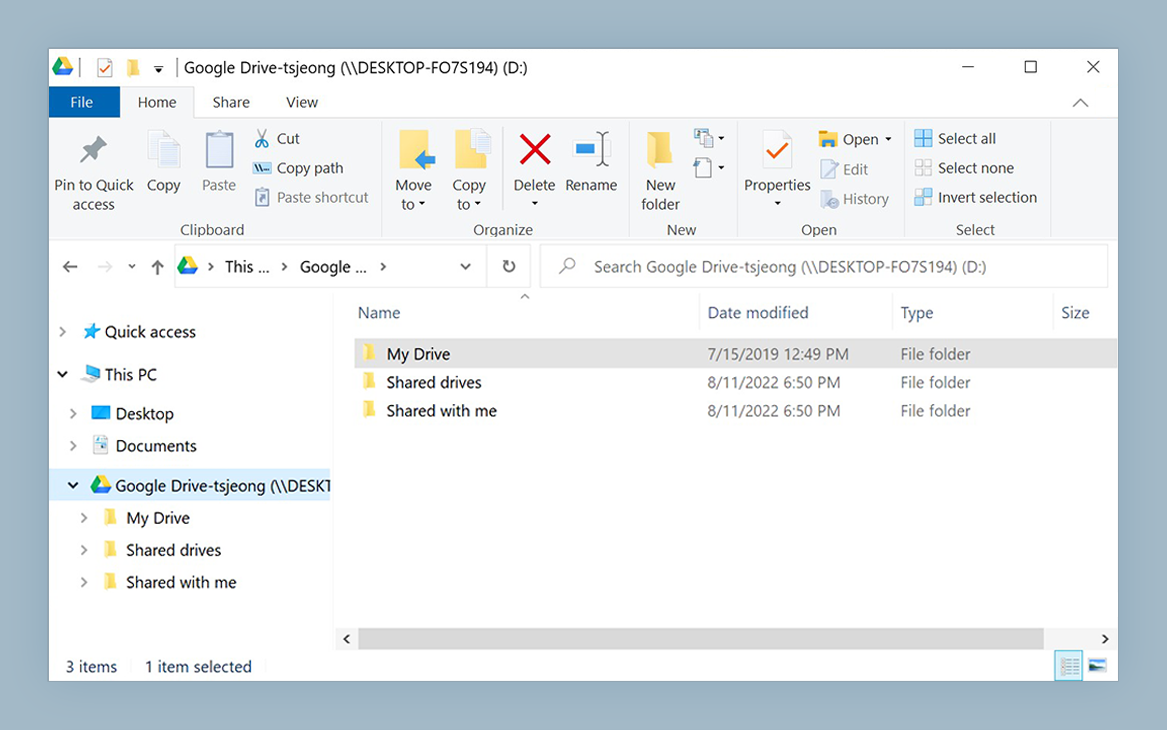
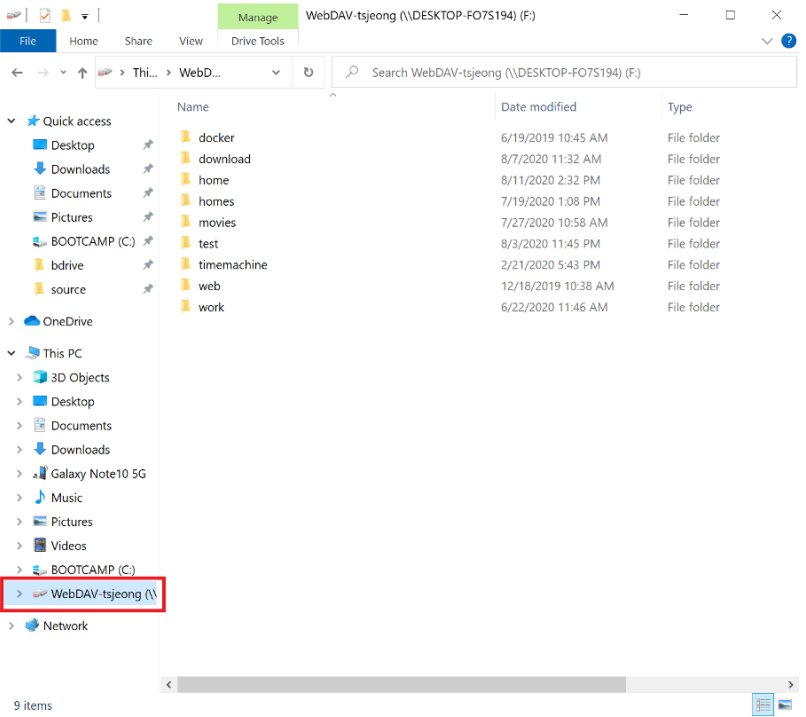
Within a few seconds, the bucket appears in Finder’s sidebar. Opening it shows your objects exactly as they look in the Alibaba Cloud console.
Upload Modes and Bandwidth Control
NetDrive defaults to asynchronous upload, which means file copy operations return immediately while the transfer continues in the background. This is the right setting for most workflows — the app in the foreground doesn’t stall while a 2 GB video uploads to the bucket.
For cases where you need a file confirmed on the remote side before moving on — a CI step that reads what the previous step wrote, for example — switch the drive to synchronous upload in the drive’s settings panel.
You can also set a per-drive bandwidth limit to prevent a large upload from saturating a shared connection. Open the drive card, click the gear icon, and adjust Bandwidth limit under the Advanced section. The limit applies only to that drive, so other mounted drives continue running at full speed.
Working With Multiple Buckets
Each bucket becomes its own drive entry in NetDrive. If your project needs two buckets — incoming raw footage and processed delivery, say — add them as two separate drives, each with its own name and mount point. Drive Manager handles parallel connections without interference; both drives stay connected simultaneously.
To update a drive’s endpoint or credentials later (for instance, when rotating access keys), open the drive card’s gear menu, edit the fields, and save. The mount point and label stay the same; only the underlying connection changes.
Wrap-up
Once mounted, your Alibaba Cloud bucket behaves like any local folder on macOS. Drag files into it from Finder, open assets directly in Creative Cloud apps, or use standard command-line tools against the path. NetDrive streams content on demand so the drive appears instantly without waiting for a full sync.
If your team also runs Windows workstations, Mount Alibaba Cloud on Windows with NetDrive covers the Windows-specific steps. For other object-storage providers on macOS, see Mount Amazon S3 on macOS or Mount Tencent Cloud on macOS.
— Steve, NetDrive