Fix macFUSE Permission Denied — NetDrive Can't Mount on macOS
NetDrive uses macFUSE to mount cloud drives on macOS. If the drive won't appear in Finder after install, the kernel extension likely needs one-time approval in System Settings.
You installed NetDrive, added a cloud drive, clicked Connect — and nothing appeared in the Finder sidebar. No error dialog, no drive letter, just silence. On macOS, this almost always comes down to one missing step: macFUSE, the kernel extension NetDrive uses to mount remote filesystems, has been blocked by the OS and needs explicit one-time approval.
Mount any cloud drive directly from Finder
NetDrive lets Google Drive, OneDrive, S3, SFTP, WebDAV and more appear as native drives on Windows and macOS — no syncing, no full downloads.
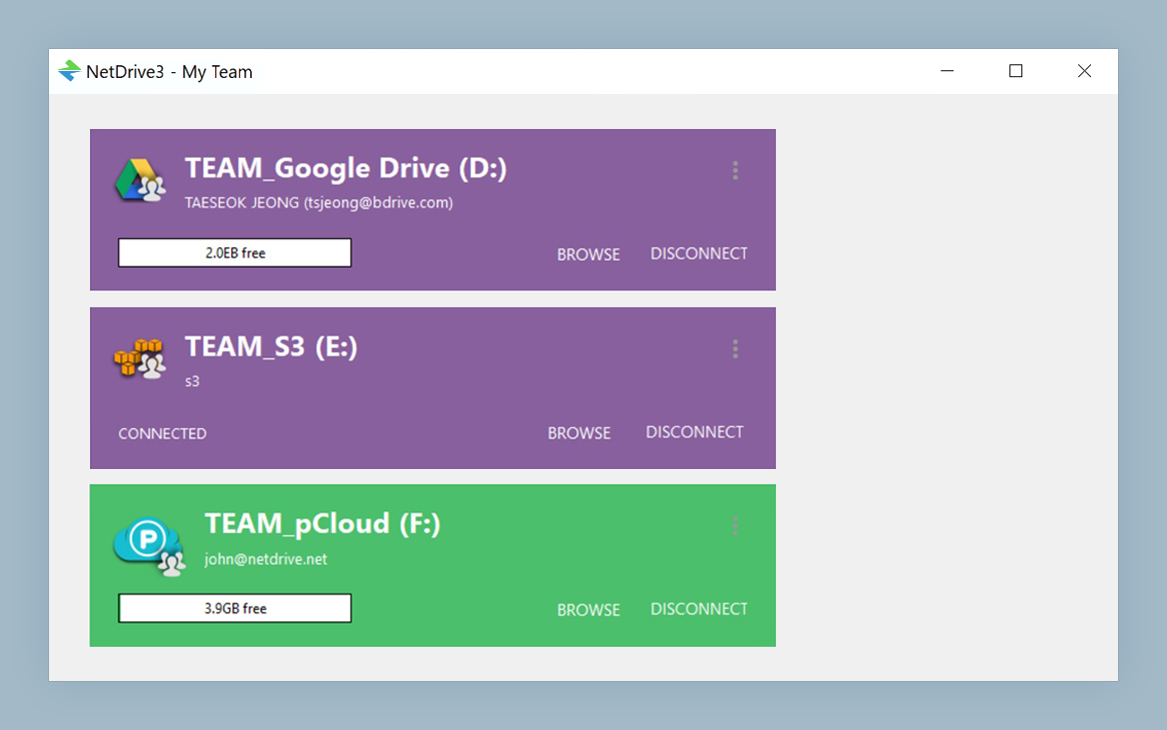
- Google Drive, OneDrive, S3, pCloud, and 20+ storage providers
- Native Finder integration — no sync, no local copy
- One approval step, then mounts automatically on every login
Free trial. Lifetime and subscription plans available.
Why macFUSE Gets Blocked
NetDrive on macOS uses macFUSE (formerly osxfuse), an open-source kernel extension that lets applications implement filesystems in user space without requiring Apple’s proprietary filesystem APIs. Starting with macOS 10.15 Catalina, Apple requires explicit user approval for any third-party kernel extension. On macOS 14 Sonoma — the minimum version for NetDrive 3.18 and later — that approval lives in System Settings → Privacy & Security.
Without the approval, macFUSE loads but cannot operate, and NetDrive silently fails to connect. The symptoms look like:
- A drive entry in the NetDrive manager that stays “disconnected” after clicking Mount
- A Finder sidebar that never shows the new drive under Locations
- A brief spinning indicator that disappears with no error message
All three point to the same root cause.
Step 1 — Confirm macFUSE Is Installed
Open System Settings → General → Storage and check whether macFUSE appears, or look for a macFUSE pane in System Settings (older macFUSE versions add one). If macFUSE is absent entirely, the NetDrive installer should have prompted you to install it during setup. If that step was skipped, download macFUSE from osxfuse.github.io and run the package installer.
After installing macFUSE for the first time, macOS immediately shows a security alert in the top-right corner of the screen. Do not dismiss it — that notification is your direct entry point to the approval dialog.
Step 2 — Allow the System Extension in Privacy & Security
If you dismissed the alert or missed it, navigate there manually:
- Open System Settings (the gear icon in the Dock or Apple menu).
- Click Privacy & Security in the left sidebar.
- Scroll down to the Security section near the bottom of the page.
- Look for a banner that reads: “System software from developer [name] was blocked from loading.”
- Click Allow.
- Enter your administrator password when prompted.
- Restart your Mac if macOS asks you to — the extension cannot become active until after a reboot on some versions of Sonoma.
If the Allow button does not appear, one of two things has happened: the extension is already approved (proceed to Step 3), or macFUSE needs to be fully removed, the Mac rebooted, and macFUSE reinstalled so macOS can present the approval prompt again.
Step 3 — Retry the Mount
Once macFUSE is approved:
- Open NetDrive.
- Find your drive entry and click Mount (or the connect icon).
- Wait 5–10 seconds — on a fresh mount the first directory listing fetches metadata from the cloud provider, which adds a brief delay.
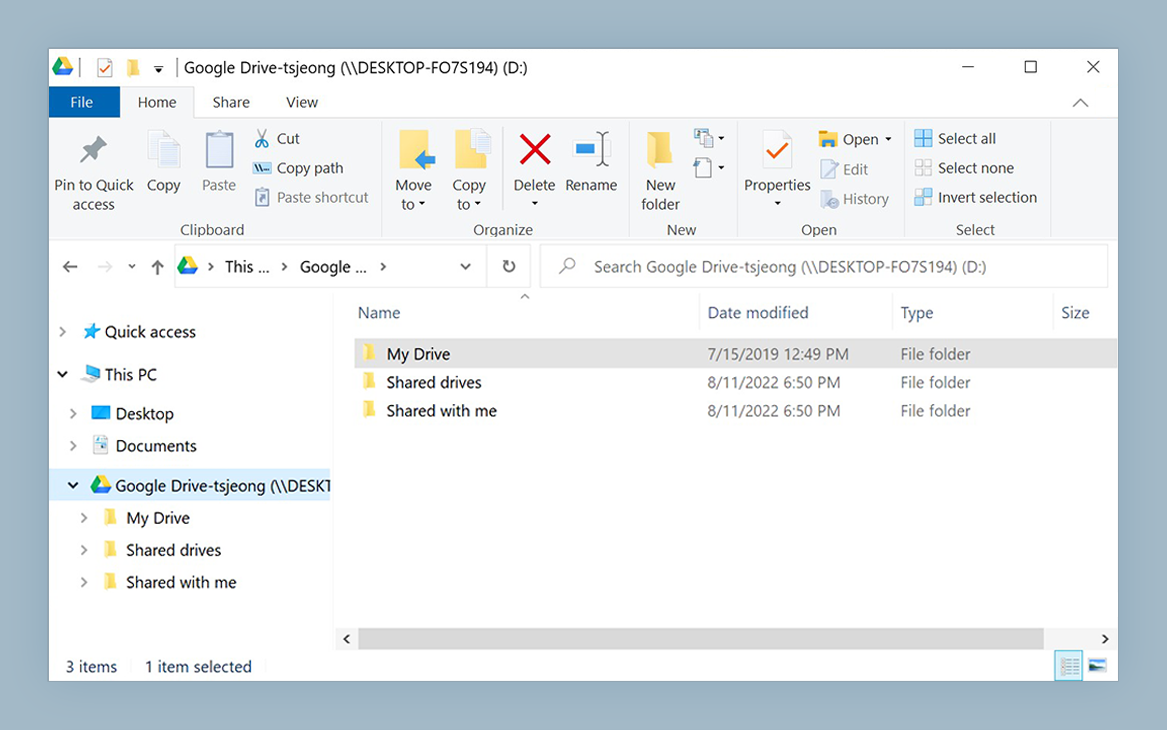
The drive should now appear in the Finder sidebar under Locations, behaving identically to a USB disk or a network share.

If you have auto-mount set to Login, log out and back in — NetDrive will mount the drive automatically during your next session without any manual intervention.
Step 4 — Check macOS Version Compatibility
NetDrive 3.18 and later require macOS 14 Sonoma as the minimum. Running the current installer on macOS 13 Ventura or earlier will fail. In that case, download NetDrive 3.17 from the download page, which supports macOS 13 Ventura and earlier macOS releases going back to macOS 11 Big Sur.
Refer to the full macOS compatibility table to match the right NetDrive version to your specific macOS release before installing.
Why the Approval Only Happens Once
Once you approve macFUSE in Privacy & Security, macOS records that decision in its security policy database. Future reboots, macFUSE point-release updates, and NetDrive updates do not trigger re-approval. The only events that reset the approval are:
- A macOS clean install (the policy database is wiped)
- Manually removing macFUSE and reinstalling it
In either case, the same System Settings → Privacy & Security → Security → Allow flow applies.
Wrap-up
The blocked macFUSE kernel extension is the single most common reason NetDrive appears to do nothing on a fresh macOS setup. One trip to Privacy & Security → Security → Allow resolves it permanently. Once mounted, any provider NetDrive supports — Google Drive, OneDrive, S3, pCloud, and more — appears in Finder like any local volume. For pCloud specifically, see Mount pCloud on macOS — NetDrive Setup Guide for the full connection walkthrough.
— Tayson, NetDrive