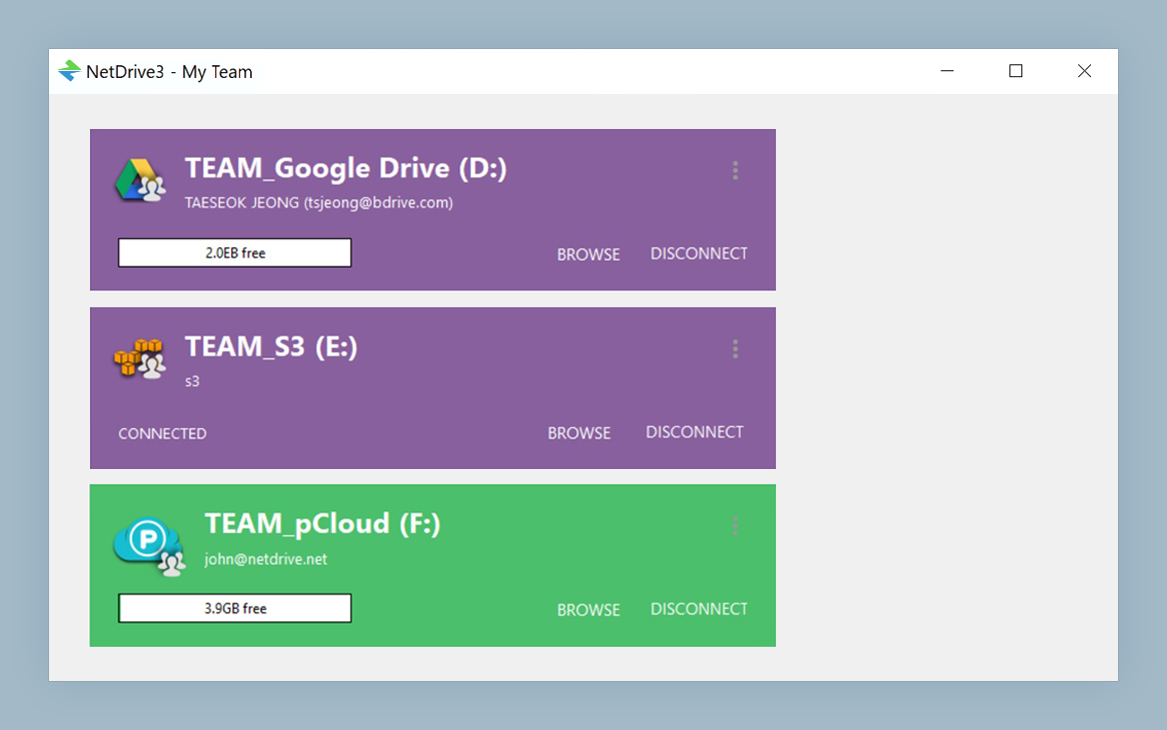
Mount Amazon S3 on macOS with NetDrive — buckets in Finder, no Console required

Mount any Amazon S3 bucket as a native macOS volume with NetDrive. Browse, drag-and-drop, and queue multi-gigabyte uploads from Finder on macOS 14 and later.
You have a 60 GB folder of training data on your Mac, an s3://ml-team-staging/ bucket waiting for it, and zero patience for the AWS Console upload page reminding you that anything past 5 GB needs the CLI. NetDrive turns the bucket into a Finder volume on macOS, so the upload becomes a regular drag-and-drop and the multipart logic happens behind the scenes.
Bring your S3 buckets into Finder
NetDrive lets Google Drive, OneDrive, S3, SFTP, WebDAV and more appear as native drives on Windows and macOS — no syncing, no full downloads.
- Drag-and-drop uploads with multipart for files over 5 GB
- Streaming reads — no full sync of the bucket to your SSD
- Region auto-detection in NetDrive 3.19, so a misclicked endpoint stops costing you a re-mount
Free trial. Lifetime and subscription plans available.
Why mount S3 instead of using the Console or aws s3 cp
The AWS Console’s upload page is fine for a handful of small files. It is not fine when you want to copy a directory tree, resume a partial upload, or hand a junior the keys to a single bucket without teaching them the CLI flags first. aws s3 sync solves the upload problem, but it leaves the bucket invisible to every macOS app that doesn’t know about it — Finder, Preview, Quick Look, the editor of your choice.
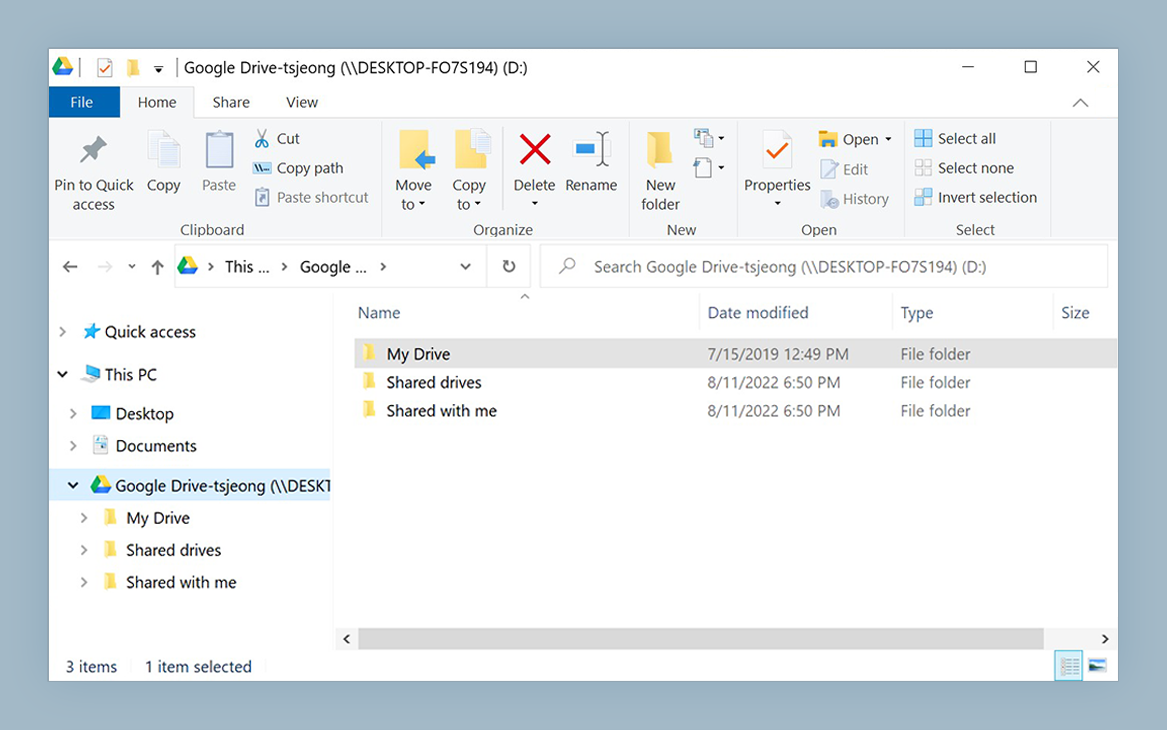
NetDrive picks the third option: present the bucket as if it were a removable volume. Finder shows objects as files, folders as folders, and an editor opening logo.psd under the mounted volume just sees a file at a normal path. NetDrive caches what you read, streams what you don’t, and chunks uploads with the S3 multipart API for anything over 5 GB.
Before you start
You need three things on the Mac side and two on the AWS side.
On macOS:
- macOS 14 (Sonoma) or later. NetDrive 3.18 raised the floor to Sonoma; if you’re still on Ventura, NetDrive 3.17 will keep working but won’t receive new feature releases.
- NetDrive 3 for macOS — DMG installer at netdrive.net/download/mac. Apple Silicon Macs run a native ARM64 binary (since 3.14.309), no Rosetta involved.
- macFUSE — the macOS download page links the project at osxfuse.github.io; install it before you launch NetDrive for the first time.
On AWS:
- An IAM user or role with at least
s3:ListBucketand the read/write actions you actually need (s3:GetObject,s3:PutObject,s3:DeleteObject,s3:AbortMultipartUpload). Don’t reuse your root account. - An access key pair generated for that IAM principal. Keep them somewhere a password manager handles, not in a shell history file.
Trial users get 7 days to confirm the workflow before deciding on a license.
Step by step: add an S3 drive in NetDrive
- Open NetDrive from the Applications folder. If this is your first launch on this Mac, sign in with your Bdrive account so your trial or license is recognised.
- Click “New drive” and pick Amazon S3 from the provider list. S3 lives in the object-storage section alongside Wasabi, Backblaze B2, Azure Blob, and Google Cloud Storage.
- Paste your access key and secret. NetDrive uses them only to authenticate against the bucket — keep the IAM principal scoped narrowly so a leaked workstation isn’t a leaked production account.
- Pick a bucket and (optionally) a prefix. Leave the prefix blank to mount the whole bucket, or set it to
team/photos/2026/if you want a single subtree to behave as the mount root. From NetDrive 3.19.7 onwards the region is auto-detected from the bucket metadata — earlier versions still expect you to pick it explicitly. - Choose a mount type. Network drive is the default and works for most apps. Read-only is the safer pick for a production bucket you’re only browsing; removable helps with the rare app that refuses to write to network volumes.
- Click Mount. Finder pops up with the bucket as a new sidebar item.
What to know once the bucket is mounted
Multipart for big objects. Anything past 5 GB goes through S3’s multipart upload API automatically — that’s been the default since NetDrive 3.5.434 — so a network blip while pushing a 22 GB Final Cut export won’t lose the whole file.
Background uploads. Drop a file onto the volume and Finder hands control back immediately. NetDrive’s drive manager shows the queue and progress for each in-flight transfer.
S3-compatible endpoints. If you also use Wasabi, Backblaze B2, or a self-hosted MinIO, the same Amazon S3 entry handles them — point it at the custom endpoint instead of the AWS one. Wasabi support landed in NetDrive 3.4.398, Backblaze B2 in 3.5.434, and MinIO compatibility in 3.15.450.
Cache size. Under Preferences → Cache you can cap NetDrive’s local cache from 100 GB up to 1 TB. Bias generous if your Mac has the SSD headroom — re-opening the same 4 GB master is instant when it’s already cached.
Wrap-up
Mounting an S3 bucket on macOS with NetDrive is mostly an IAM-credentials decision followed by picking a bucket name. Once it’s live, Finder treats it like any other volume — which is the whole point. If you also work from Windows, the Google Drive on Windows 11 walkthrough covers the same flow with Google’s OAuth instead of an access-key pair, and the NetDrive 3.18 macOS notes explain the Sonoma floor in more detail.
— Kai, NetDrive