How to mount Google Drive on Windows 11 — as a real drive letter
Skip the full-sync client. With NetDrive, your Google Drive shows up in File Explorer as Z: (or any letter you pick) and streams files on demand.
You have a 1.2 TB Google Drive, a 256 GB Windows 11 laptop, and no interest in waiting for the official client to decide which folders to download today. NetDrive solves that one specific problem: it puts your Drive behind a drive letter in File Explorer, so files load when you actually open them — not before.
Mount Google Drive on Windows 11 in about a minute
Pick a drive letter. Sign in. Done. NetDrive streams files from Drive on demand instead of syncing the whole account.
- Drive-letter access (Z:, Y:, X: — your choice)
- On-demand streaming with a local cache, not a full sync
- Works with personal Google accounts, Workspace, and shared drives
Free trial. Lifetime and subscription plans available.
Why mount instead of sync
The official Google Drive for desktop client mirrors your Drive into a local folder. That’s fine when your Drive fits on your SSD and you don’t mind background traffic. It is not fine when you have hundreds of gigabytes of design files, video assets, or shared-drive archives that you only ever touch a few percent of in any given week.
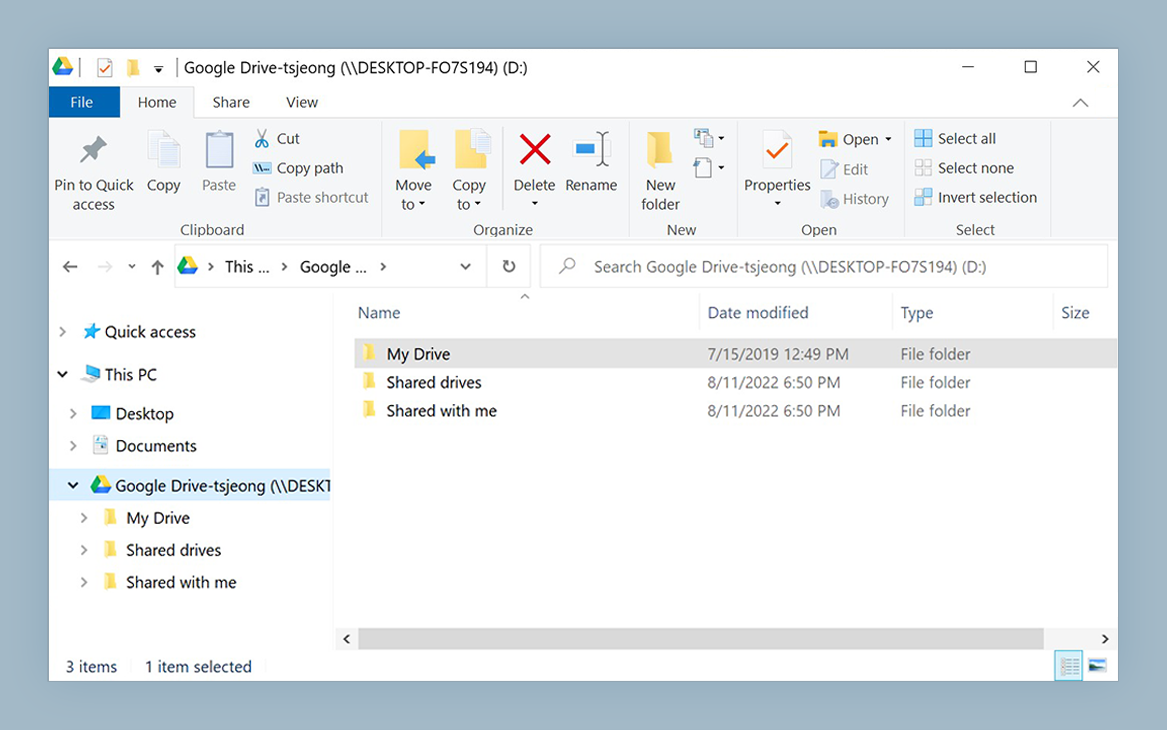
NetDrive takes the other approach. Your Drive appears as a real Windows
drive — This PC → Z: — and File Explorer treats the contents like
ordinary files and folders. Open one and NetDrive pulls just that file
through its cache. Close it and the bytes can be evicted. No 1.2 TB
ghost folder eating your SSD.

Before you start
You need three things:
- Windows 11 (or Windows 10, 8.1, 8 — even Server 2012/2016/2019/2022 are supported).
- A Google account. Personal, Workspace, or both. Shared drives (“Team Drives”) are enabled by default.
- NetDrive 3 for Windows — grab the EXE installer from
netdrive.net/download/windows.
Sysadmins rolling NetDrive out across machines should use the MSI
package and
msiexec /i NetDrive3-<version>.msi REINSTALL=ALL REINSTALLMODE=vamusinstead.
The free trial is 7 days, which is plenty to confirm Drive behaves the way you want before committing to a license.
Step by step: mount Google Drive
-
Open NetDrive from the Start menu. If this is your first launch, sign in with your Bdrive account (the one tied to your license or trial).
-
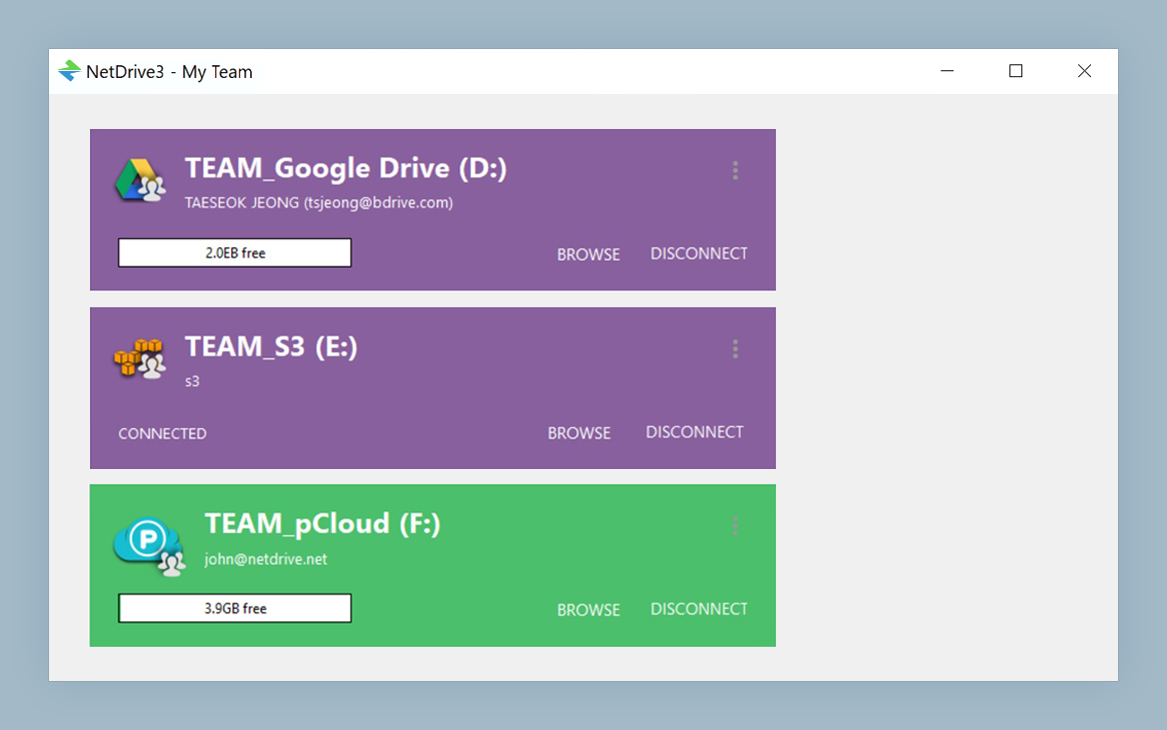
Click “New drive” in the left panel. NetDrive lists every cloud it supports — pick Google Drive. (For a Workspace account with shared drives, the same Google Drive entry handles both — shared drives appear at the top level once you connect.)
-
Authorize the connection. A browser window opens at
accounts.google.com. Sign in, review the scopes Google asks for, and approve. NetDrive receives a refresh token and the browser tab closes itself. -
Pick a drive letter. NetDrive defaults to the first free letter from
Z:downwards. If you already haveZ:in use for a corporate share, pull down the list and pick anything else —G:for “Google” is a popular choice. -
Choose a mount type. Network drive is the right default for Drive. Removable drive is useful if you want apps that refuse to write to network drives (some video editors, older installers) to accept it. Read-only is great when you’re just browsing a shared archive.
-
Click Mount. A few seconds later, File Explorer pops up showing your Drive contents.

That’s the whole flow. The first listing of a folder you’ve never opened may take a moment while NetDrive caches the metadata; after that it feels like any other drive.
A few settings worth knowing
Mount on boot, without logging in. If you keep documents on Drive and want them available the moment Windows comes up — even before anyone signs in — open the drive’s properties in NetDrive and set Auto-mount to Boot. Useful for shared workstations and headless boxes that run scheduled tasks against Drive content.

Cache size. Under Preferences → Cache, you can cap the local
cache anywhere from 100 GB up to 1 TB. The cache is what makes opening
a 4 GB video twice in a row instant — keep it generous if your SSD
allows.
File status icons. Windows Explorer shows overlay icons next to files NetDrive is currently uploading or has locked. If you don’t see them, restart Explorer once after install — Windows only loads overlay handlers at shell startup.
Background uploads. Save a 12 GB project file to your Drive letter and Windows hands control back immediately. NetDrive uploads the file in the background and shows progress in its main window. You don’t have to keep the dialog open or wait for a sync icon to settle.
When something goes wrong
The two most common first-mount issues on Windows 11 are easy to fix:
- “Missing dependencies” on launch. NetDrive ships against the
Microsoft Visual C++ Redistributables. Most Windows 11 machines
already have them, but a fresh install or a stripped LTSC image may
not. The download page links the exact
vcredist12_x64.exeandvcredist14_x64.exeyou need. - Drive letter taken. If you mapped a network share to the same letter earlier, NetDrive will refuse to mount on top. Pick another letter, or unmap the old share first under This PC → Map network drive → Disconnect.
If a folder seems out of date because someone edited a file from Drive’s web UI, right-click the folder inside the mounted drive and choose Force refresh — NetDrive re-fetches the listing immediately instead of waiting for its change-detection interval.
![]()
Wrap-up
Mounting Google Drive on Windows 11 with NetDrive is mostly a ten-second decision (which drive letter?) followed by an OAuth round trip. If you want to push the setup further — auto-mount at boot, shared-drive workflows, or Office file locking for collaborative editing — the NetDrive forum is the fastest place to ask, and the macOS 14 release post is worth a glance if you also use a Mac.
— Tayson, NetDrive